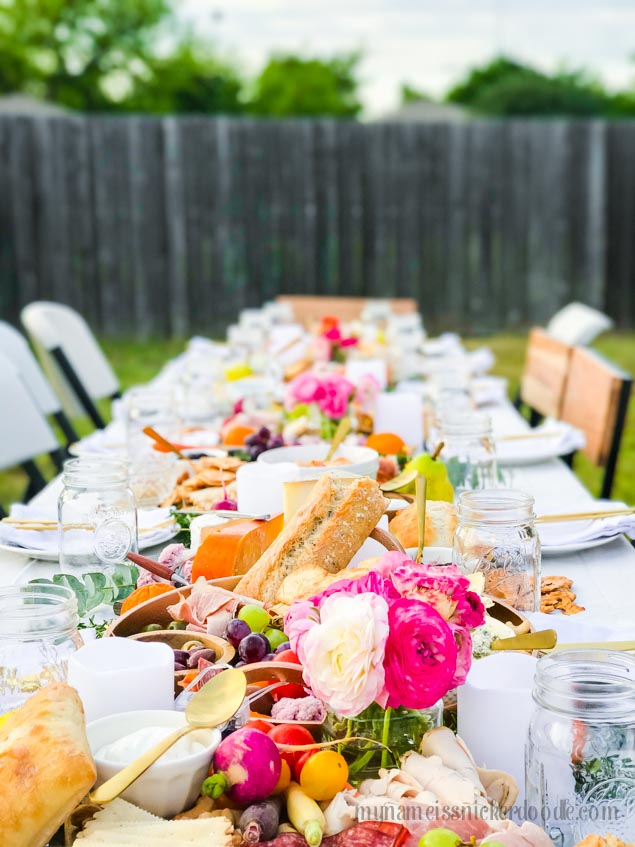
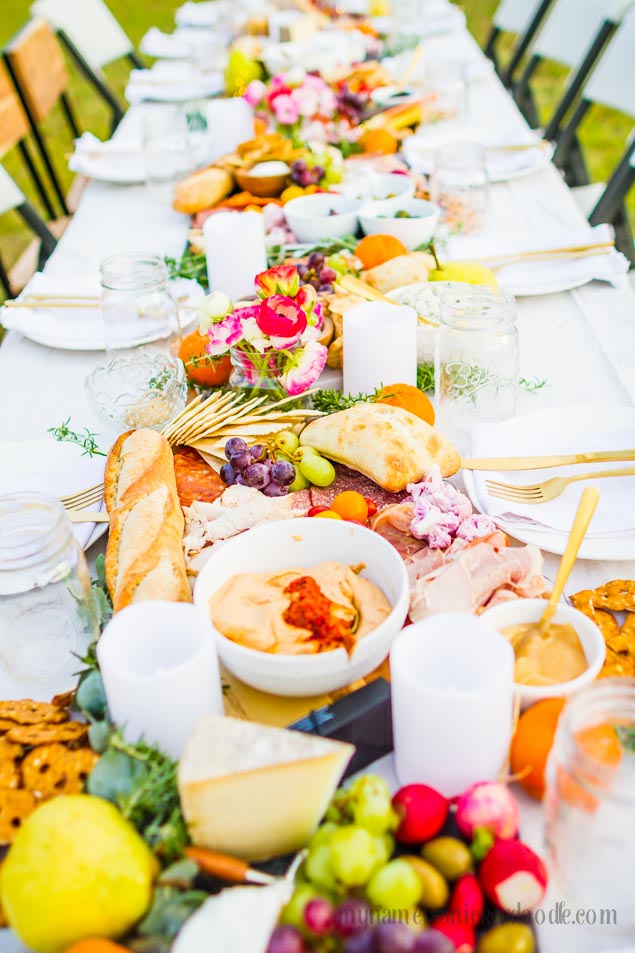
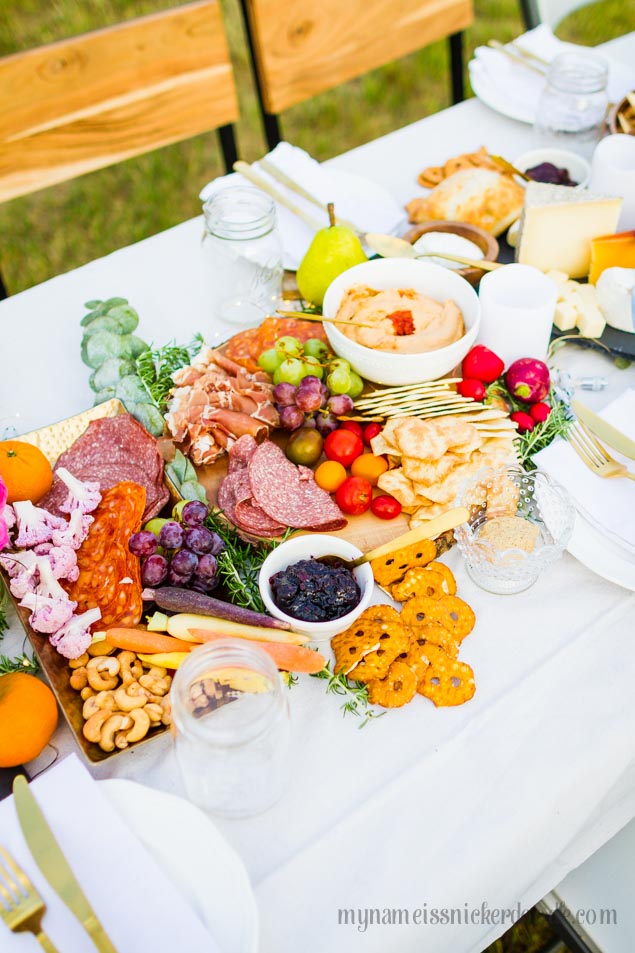
Here you will find the ultimate guide to building one gorgeous charcuterie board!
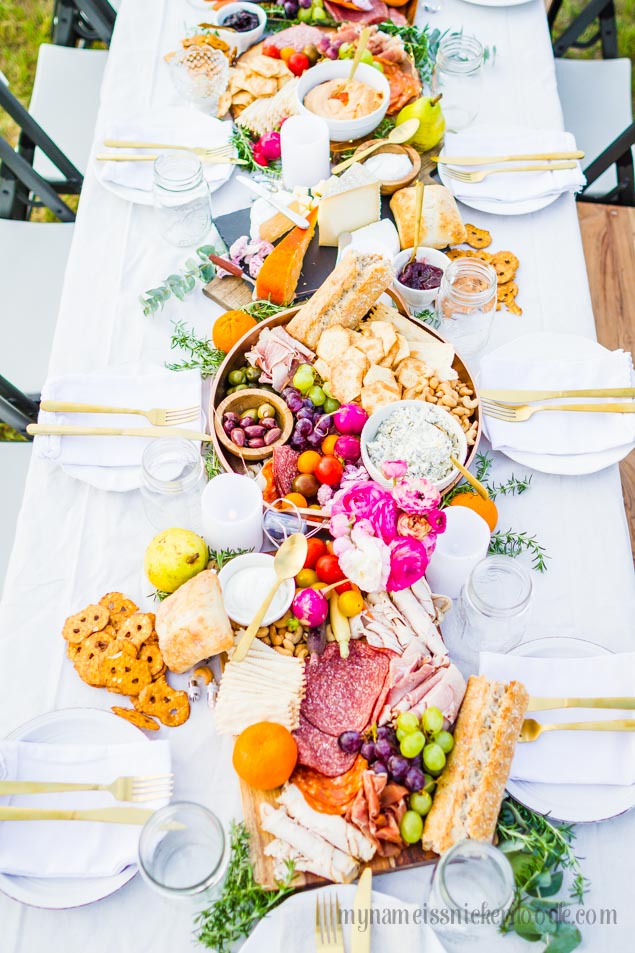
Even though there is no cooking involved in creating a charcuterie board (unless you are making your own spreads) it does take a minute to prepare ahead of time so I thought I would share what my husband and I did. This way it takes all the guess work away from you so you can completely enjoy your event. No matter how big or small!
Here’s some great steps to get you started…
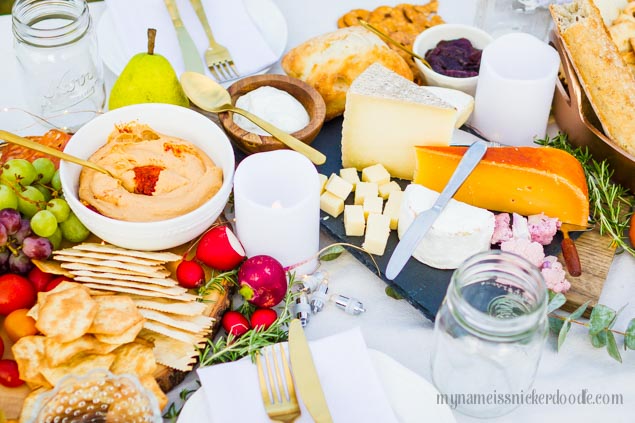
Slate, marble and copper add fun texture and color to the table. If you want a tray that isn’t food safe (like this copper one) line the bottom of it with parchment or wax paper.
Second, choose foods that you just love, but don’t be afraid to go outside of the box a little. Keep in mind your quests and what they like, but also think this is a reflection of you and your tastes.
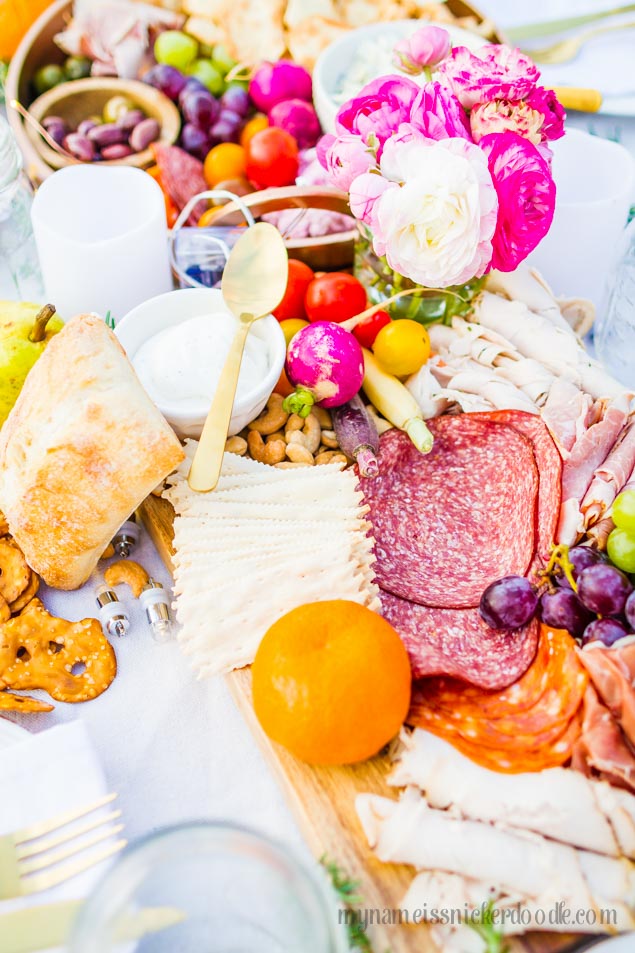
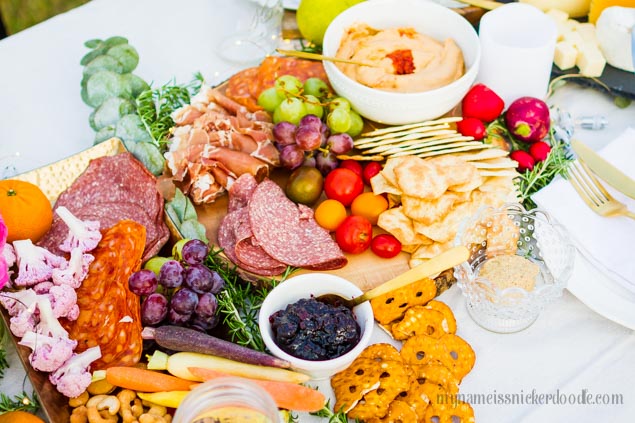
Third, make the meat and cheese the focus of your boards. Especially if this will be served as a meal and not just as an appetizer. It’s also what you will be spending the most money on when it comes to the food. Remember people eat with their eyes so pick meats of all ranges and contracts. We have a few wonderful grocer delis so we didn’t have to go any where extra special. Make sure to have it sliced thin so you can roll it or fan it out.
You’ll also want hard and soft cheeses to give the palate some different textures. We specifically went to a local cheese shop (Antonelli’s) and they gave wonderful recommendations on what would work well with everything else we wanted to serve.
Meat (5 oz total per person)
- Smoked/Seasoned Turkey. We had both Smoked Hickory and Provencal turkey.
- Country Ham and Black Forest Ham
- Prosciutto
- Bologne. We had Sweet Lebanon and Regular Lebanon Bologne. It’s amazing!
- Salami
Cheese (1 lb total per person)
- Brie
- Sheep’s Milk Brie
- Beemster Classic Gouda
- Smoked Gouda
- White Cheddar
Fourth, is probably the easiest thing to choose. Bread and crackers! You can definitely go fancy with this (and spend a lot of money!), but we chose to go with what we loved and added visual texture to the tablescape. Most everything was simple in flavor so it could pair well with everything on the table. We bought crackers from Costco and our breads from Trader Joe’s.
Bread and Crackers
- Ciabatta Loaves
- French Bread Loaves
- Artisan Sourdough
- Pretzel Chips
- Crispy Sea Salt Baked Crackers
- Rosemary Italian Style Crackers
- Croccantini Crackers
- Colorful mini carrots
- Radishes
- Mini heirloom tomatoes
- Purple Cauliflower
- Sugar Snap Peas
- Whole Pears
- Clementines
- Blueberries
- Red and Green Grapes
Sixth is everything else edible! These are the salty and sweet items that kind of bring everything together.
Salt and Sweet Items
- Kalamata Olives
- Variety of Stuffed Green Olives
- Rasberry Champagne Jelly
- Black Current Jelly
- Lemon Curd
- Hummus
- Artichoke Spinach Dip
- Ranch Dip (for those that aren’t as adventurous)
- Cashews
- Almonds
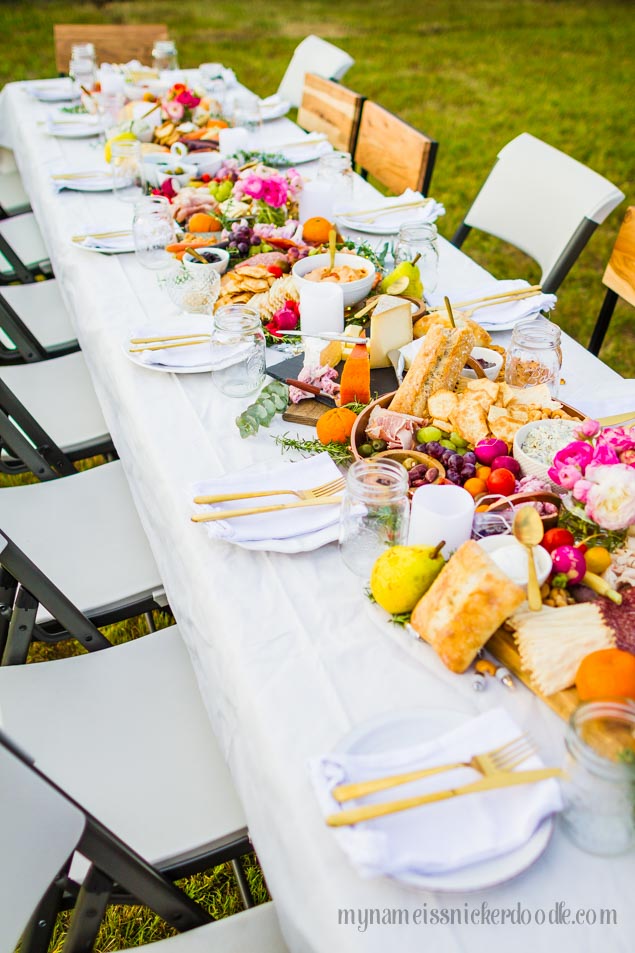
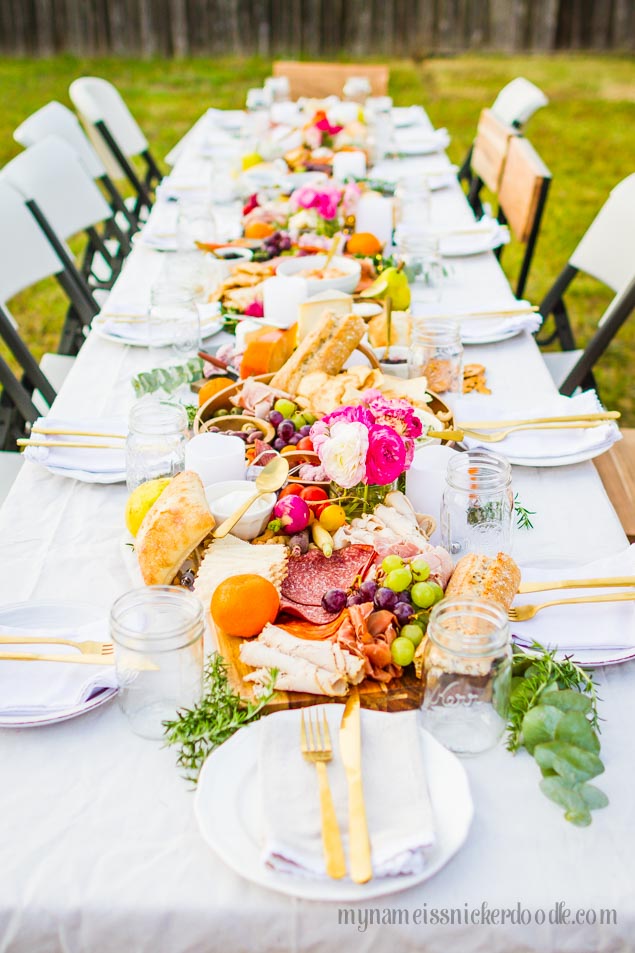
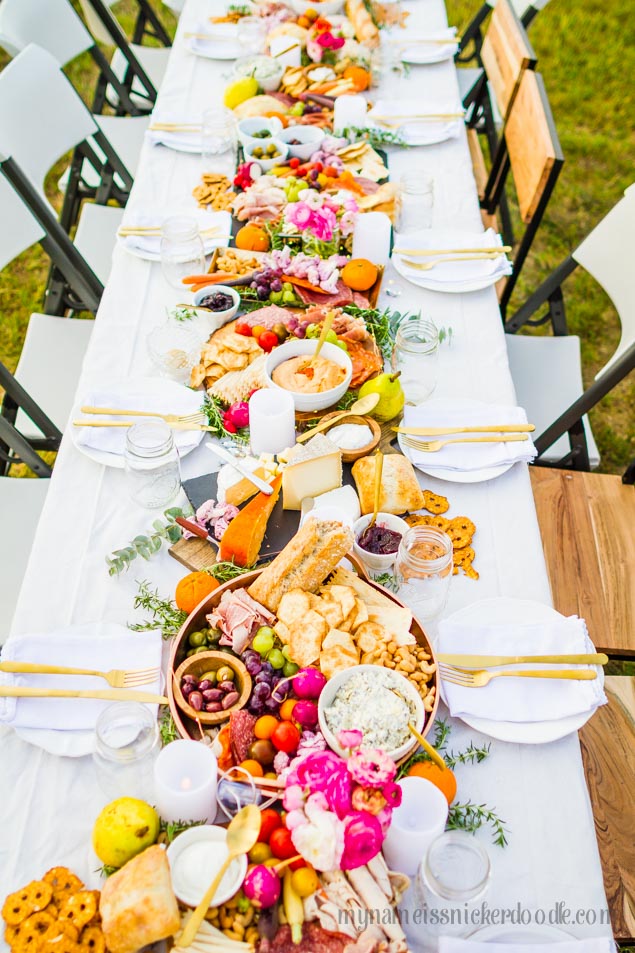
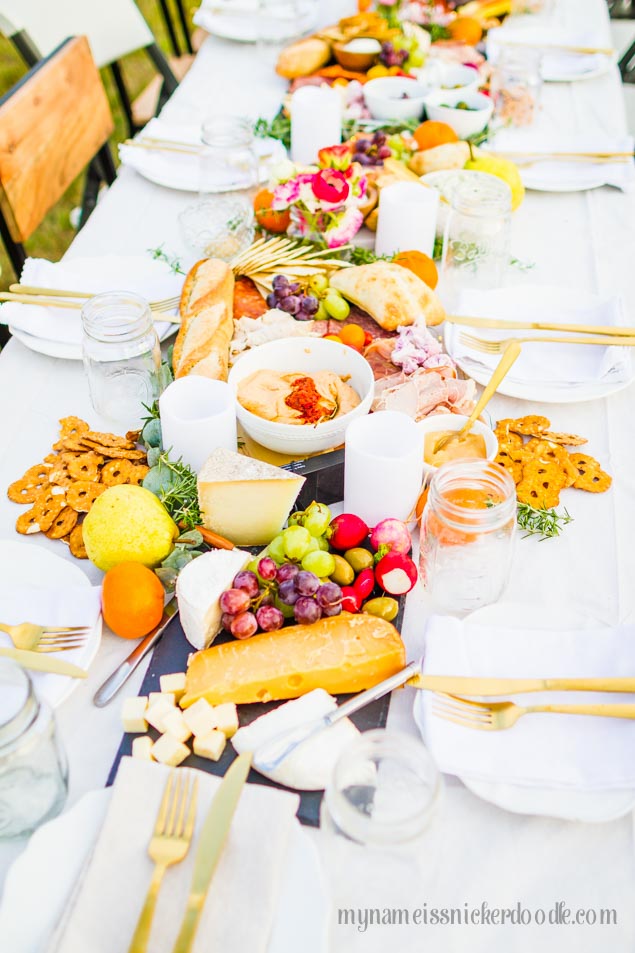
Seventh is focusing on the arrangement of everything. You really want to spread out your items so no has to pass anything or feel like they have to reach for anything.
- Lay down your tablecloth. We used a long drop cloth from the hardware store.
- Place all of the boards and trays down the center of the table.
- If you are using bowls, set them on the boards alternating sides.
- Start with your meats and cheeses first. These are what will typically be eaten first so you want to make sure you even distribute them.
- Next place your larger items like breads and vegetables.
- Fill in the blank spots with fruits, chips, crackers and nuts. These can be sprinkled throughout or even spilling off parts of the boards.
- Fill your bowls with olives and spreads.
- Once all of your food is out fill in spots with things like candles (we used battery operated), little flower arrangements in mason jars, eucalyptus, and freshly cut rosemary. We also added a few strings of battery operated LED tiny starry lights.
Lastly, step back and admire all that work you did! Your guest will be in complete awe and feel very special!
